
云原生分布式存储管理利器 Ceph 中文入门指南,块/文件/对象存储全搞定!
公众号关注「奇妙的 Linux 世界」设为「星标」,每天带你玩转 Linux !Ceph架构和基本概念Ceph架构Ceph简介无论你是想为云平台提供Ceph对象存储、Ceph块设备服务、Ceph文件系统还是将 Ceph用于其他目的,所有Ceph存储集群部署都从设置每个Ceph节点开始。一个 Ceph存储集群至少需要一个 CephMonitor、CephManager 和 CephOSD(对...
公众号关注 「奇妙的 Linux 世界」
设为「星标」,每天带你玩转 Linux !
Ceph架构和基本概念

Ceph简介
无论你是想为云平台提供Ceph对象存储、 Ceph块设备服务、Ceph文件系统还是将 Ceph用于其他目的,所有 Ceph存储集群部署都从设置每个 Ceph节点开始。一个 Ceph存储集群至少需要一个 CephMonitor、CephManager 和 CephOSD(对象存储守护进程)。运行 Ceph文件系统客户端时也需要 Ceph元数据服务器。
Ceph基本概念

• Monitors:CephMonitor (
Ceph-mon) 维护集群状态的映射,包括监视器映射、管理器映射、OSD 映射、MDS 映射和 CRUSH 映射。这些映射是 Ceph守护进程相互协调所需的关键集群状态。监视器还负责管理守护进程和客户端之间的身份验证。冗余和高可用性通常需要至少三个监视器。:一个 Ceph集群需要多个 Monitor 组成的小集群,它们通过 Paxos 同步数据,用来保存 OSD 的元数据。• Managers:CephManager守护进程 (
Ceph-mgr) 负责跟踪运行时指标和 Ceph集群的当前状态,包括存储利用率、当前性能指标和系统负载。CephManager 守护进程还托管基于 python 的模块来管理和公开 Ceph集群信息,包括基于 Web 的CephDashboard和 REST API。高可用性通常需要至少两个管理器。• CephOSD:OSD 全称 Object Storage Device,对象存储守护进程(CephOSD,
Ceph-osd)存储数据、处理数据复制、恢复、重新平衡,并通过检查其他 CephOSD 守护进程的心跳向 Ceph监视器和管理器提供一些监视信息。冗余和高可用性通常需要至少三个 CephOSD。也就是负责响应客户端请求返回具体数据的进程,一个Ceph集群一般有很多个OSD。• CRUSH:CRUSH 是 Ceph使用的数据分布算法,类似一致性哈希,让数据分配到预期的位置。Ceph将数据作为对象存储在逻辑存储池中。使用 CRUSH算法,Ceph计算出哪个归置组 (PG) 应该包含该对象,以及哪个 OSD 应该存储该归置组。CRUSH 算法使 Ceph存储集群能够动态扩展、重新平衡和恢复。
• MDS:MDS全称CephMetadata Server,Ceph元数据服务器(MDS
Ceph-mds) 代表Ceph文件系统存储元数据(即 Ceph块设备和 Ceph对象存储不使用 MDS)。Ceph元数据服务器允许 POSIX 文件系统用户执行基本命令(如ls、find等),而不会给 Ceph存储集群带来巨大负担。MDS进程并不是必须的进程,只有需要使用CephFS时,才需要配置MDS节点。• ObjectGateway:Object Gateway是对象存储接口,构建在librados之上,为应用提供restful类型的网关。其支持两种接口:S3-compatible API:兼容AWS S3 Restful接口,Swift-compaible API:兼容Openstack Swift接口。
• RADOS:RADOS 全称 Reliable Autonomic Distributed Object Store,是Ceph存储集群的基础。Ceph中的一切都以对象的形式存储,而RADOS就负责存储这些对象,而不考虑它们的数据类型。RADOS层确保数据一致性和可靠性。对于数据一致性,它执行数据复制、故障检测和恢复,还包括数据在集群节点间的recovery。
• Librados:Libradio 是RADOS提供库,简化访问RADOS的一种方法,因为 RADOS 是协议,很难直接访问,因此上层的 RBD、RGW和CephFS都是通过libradios访问的,目前支持PHP、Ruby、Java、Python、C和C++语言。它提供了Ceph存储集群的一个本地接口RADOS,并且是其他服务(如RBD、RGW)的基础,此外,还为CephFS提供POSIX接口。Librados API支持直接访问RADOS,使开发者能够创建自己的接口来访问Ceph集群存储。
• RBD:RBD全称 RADOS Block Device,是 Ceph对外提供的块设备服务。对外提供块存储。可以像磁盘一样被映射、格式化和挂载到服务器上。
• RGW:RGW全称RADOS gateway,Ceph对象网关,是Ceph对外提供的对象存储服务,提供了一个兼容S3和Swift的RESTful API接口。RGW还支持多租户和OpenStack的Keystone身份验证服务。
• CephFS:CephFS全称CephFile System,是Ceph对外提供的文件系统服务。提供了一个任意大小且兼容POSlX的分布式文件系统。CephFS依赖CephMDS来跟踪文件层次结构,即元数据。
Ceph逻辑单元
• pool(池):pool是Ceph存储数据时的逻辑分区,它起到namespace的作用,在集群层面的逻辑切割。每个pool包含一定数量(可配置)的PG。
• PG(Placement Group):PG是一个逻辑概念,每个对象都会固定映射进一个PG中,所以当我们要寻找一个对象时,只需要先找到对象所属的PG,然后遍历这个PG就可以了,无需遍历所有对象。而且在数据迁移时,也是以PG作为基本单位进行迁移。PG的副本数量也可以看作数据在整个集群的副本数量。一个PG 包含多个 OSD 。引入 PG 这一层其实是为了更好的分配数据和定位数据。
• OID:存储的数据都会被切分成对象(Objects)。每个对象都会有一个唯一的OID,由ino与ono生成,ino即是文件的File ID,用于在全局唯一标示每一个文件,而ono则是分片的编号,OID = ( ino + ono )= (File ID + File part number),例如File Id = A,有两个分片,那么会产生两个OID,A01与A02。
• PgID:首先使用静态hash函数对OID做hash取出特征码,用特征码与PG的数量去模,得到的序号则是PGID。
• Object:Ceph最底层的存储单元是 Object对象,每个 Object 包含元数据和原始数据。
Ceph存储集群
Ceph存储集群是所有 Ceph部署的基础。基于RADOS,Ceph存储集群由几种类型的守护进程组成:
1. CephOSD 守护进程(OSD) 将数据作为对象存储在存储节点上
2. CephMonitor (MON) 维护集群映射的主副本。
3. CephManager 管理器 守护进程
一个 Ceph存储集群可能包含数千个存储节点。一个最小的系统至少有一个 CephMonitor 和两个 CephOSD Daemons 用于数据复制。
Ceph文件系统、Ceph对象存储和 Ceph块设备从 Ceph存储集群读取数据并将数据写入到 Ceph存储集群。
Ceph支持三种接口:
• Object:有原生的API,而且也兼容 Swift 和 S3 的 API
• Block:支持精简配置、快照、克隆
• File:Posix 接口,支持快照
三种存储类型
块设备:主要是将裸磁盘空间映射给主机使用,类似于SAN存储,使用场景主要是文件存储,日志存储,虚拟化镜像文件等。
文件存储:典型代表:FTP 、NFS 为了克服块存储无法共享的问题,所以有了文件存储。
对象存储:具备块存储的读写高速和文件存储的共享等特性并且通过 Restful API 访问,通常适合图片、流媒体存储。
Ceph存储数据流程
例如:当client向Ceph集群中写入一个文件时,这个文件是如何存储到Ceph中的,其存储过程是如何
Ceph存储流程图

Ceph是一个分布式存储系统,它的存储流程如下:
1. 对象写入:客户端将数据写入一个对象,并将对象的元数据存储到RADOS集群中。客户端可以直接连接到集群,或者通过Ceph块设备、Ceph文件系统或者其他应用程序接口访问。
2. 数据分配:RADOS集群接收到写请求后,会将对象分配给适当的OSD(对象存储设备)。OSD是Ceph中的存储单元,每个OSD可以管理多个对象。如果对象已经存在,则OSD将更新现有对象的数据。
3. 数据复制:Ceph使用复制来确保数据的可靠性和可用性。每个对象都会被复制到多个OSD上,这些OSD分布在不同的物理服务器上。默认情况下,Ceph将每个对象复制三次,但是可以通过修改配置来更改复制级别。
4. 数据恢复:如果一个OSD宕机或发生故障,Ceph会自动将该OSD上的对象复制到其他OSD上,以确保数据的可靠性和可用性。
5. 数据读取:当客户端请求对象时,RADOS集群会将对象的元数据返回给客户端,并确定对象的位置。然后,RADOS集群会将对象的副本发送到客户端,客户端可以从中读取数据。
6. 数据删除:当对象被删除时,RADOS集群会将对象从所有OSD上删除,并清除对象的元数据。
总的来说,Ceph的存储流程包括对象写入、数据分配、数据复制、数据恢复、数据读取和数据删除。这些步骤确保了数据的可靠性和可用性,并为客户端提供了高性能的访问方式。
除了上述的Ceph存储流程,还有一些其他的细节需要注意:
1. 数据分布:Ceph使用CRUSH算法来决定对象应该存储在哪些OSD上。CRUSH算法考虑了不同服务器的负载和故障域,确保数据分布均衡和可靠性。
2. 网络通信:Ceph集群中的节点之间使用RADOS协议进行通信,这是一种基于TCP的协议。数据传输也可以通过RDMA(Remote Direct Memory Access)进行加速。
3. 数据压缩:Ceph支持数据压缩,可以通过配置来启用。当对象写入时,Ceph会对数据进行压缩,然后再将其存储到OSD上。当对象读取时,Ceph会自动解压缩数据。
4. 快照:Ceph支持快照功能,可以对对象或整个存储池进行快照。快照可以保留对象的历史版本,并且可以用于数据恢复或测试。
总之,Ceph的存储流程涉及多个步骤和算法,这些步骤和算法共同确保了数据的可靠性、可用性和高性能访问。Ceph的灵活性和可扩展性使得它成为了一个流行的分布式存储系统,并被广泛用于云计算、大数据等领域。
Ceph存储流程详解
• File: 就是我们想要存储和访问的文件,这个是面向我们用户的,是我们直观操作的对象。
• Object:object就是Ceph底层RADOS所看到的对象,也就是在Ceph中存储的基本单位。object的大小由RADOS限定(通常为2m或者4m)。
• PG (Placement Group): PG是一个逻辑的概念,它的用途是对object的存储进行组织和位置的映射,通过它可以更好的分配数据和定位数据。
• OSD (Object Storage Device): 它就是真正负责数据存取的服务。
1. 文件到对象的映射
首先,将file切分成多个object,每个object的大小由RADOS限定(通常为2m或者4m)。每个object都有唯一的id即oid,oid由ino和ono产生的
• ino:文件唯一id(比如filename+timestamp)
• ono:切分后某个object的序号(比如0,1,2,3,4,5等)
2. 对象到归置组的映射
对oid进行hash然后进行按位与计算得到某一个PG的id。mask为PG的数量减1。这样得到的pgid是随机的。
注:这与PG的数量和文件的数量有关系。在足够量级的程度上数据是均匀分布的。
3. 归置组到OSD的映射
通过CRUSH算法可以通过pgid得到多个osd,简而言之就是根据集群的OSD状态和存储策略配置动态得到osdid,从而自动化的实现高可靠性和数据均匀分布。在Ceph中,数据到底是在哪个osd是通过CRUSH算法计算出来的
Ceph查看一个object的具体存放位置
### 1. 新建一个test-pool池
[root@rook-Ceph-tools-c76dd697d-tn75t /]### Cephosd pool create test-pool 1 1
pool 'test-pool' created
### 查询系统中所有的pool
[root@rook-Ceph-tools-c76dd697d-tn75t /]### rados lspools
device_health_metrics
test-pool

### 2. 上传一个文件到test池中
#OBJECT COMMANDS
###   get <obj-name> [outfile]         fetch object
###   put <obj-name> [infile]          write object
[root@rook-Ceph-tools-c76dd697d-tn75t /]### touch hello.txt
[root@rook-Ceph-tools-c76dd697d-tn75t /]### rados -p test-pool put test hello.txt

### 3. 查看test池中刚上传的对象
[root@rook-Ceph-tools-c76dd697d-tn75t /]### rados -p test-pool ls | grep test
test
### 4. 查看对象位置
[root@rook-Ceph-tools-c76dd697d-tn75t /]### Cephosd map test-pool test
osdmap e24 pool 'test-pool' (2) object 'test' -> pg 2.40e8aab5 (2.35) -> up ([0], p0) acting ([0], p0)
### 这代表test-pool中的test这个对象位于2.35这个pg中,并且位于osd0上(目前是单点的Ceph,所以没有副本)

### 5. 进入到对应osd的存储目录,找到对应文件即可
/var/lib/Ceph/osd/Ceph-0/current/2.35_head
### 这个目录下存放了2.35这个pg中所有的object,可以根据指纹40e8aab5来定位到具体的文件。
Ceph IO流程及数据分布


步骤:
1. client 创建cluster handler。
2. client 读取配置文件。
3. client 连接上monitor,获取集群map信息。
4. client 读写io 根据crushmap 算法请求对应的主osd数据节点。
5. 主osd数据节点同时写入另外两个副本节点数据。
6. 等待主节点以及另外两个副本节点写完数据状态。
7. 主节点及副本节点写入状态都成功后,返回给client,io写入完成。
Ceph 新主IO流程图
说明:
如果新加入的OSD1取代了原有的 OSD4成为 Primary OSD, 由于 OSD1 上未创建 PG , 不存在数据,那么 PG 上的 I/O 无法进行,怎样工作的呢?

步骤:
(1)client连接monitor获取集群map信息。
(2)同时新主osd1由于没有pg数据会主动上报monitor告知让osd2临时接替为主。
(3)临时主osd2会把数据全量同步给新主osd1。
(4)client IO读写直接连接临时主osd2进行读写。
(5)osd2收到读写io,同时写入另外两副本节点。
(6)等待osd2以及另外两副本写入成功。
(7)osd2三份数据都写入成功返回给client, 此时client io读写完毕。
(8)如果osd1数据同步完毕,临时主osd2会交出主角色。
(9)osd1成为主节点,osd2变成副本。
使用Rook搭建Ceph 1.7.6 集群
Ceph部署
1. 虚拟机挂载裸盘
[root@master-1 ~]### lsblk
NAME            MAJ:MIN RM  SIZE RO TYPE MOUNTPOINT
sda               8:0    0   50G  0 disk
├─sda1            8:1    0  500M  0 part /boot
└─sda2            8:2    0 49.5G  0 part
  ├─centos-root 253:0    0 47.5G  0 lvm  /
  └─centos-swap 253:1    0    2G  0 lvm
sdb               8:16   0   10G  0 disk ### 刚新增的裸盘
sr0              11:0    1  4.4G  0 rom
部署Ceph后,新增的裸盘使用情况
[root@master-1 rook-Ceph]### lsblk
NAME                                                                                                  MAJ:MIN RM  SIZE RO TYPE MOUNTPOINT
sda                                                                                                     8:0    0   50G  0 disk
├─sda1                                                                                                  8:1    0  500M  0 part /boot
└─sda2                                                                                                  8:2    0 49.5G  0 part
  ├─centos-root                                                                                       253:0    0 47.5G  0 lvm  /
  └─centos-swap                                                                                       253:1    0    2G  0 lvm
sdb                                                                                                     8:16   0   10G  0 disk
└─Ceph--bcd8be98--d8f0--4aa6--b4ef--1f1246ae6e62-osd--block--96232ae8--a0a7--4b90--b7cf--8269a74754e0 253:2    0   10G  0 lvm
sr0                                                                                                    11:0    1  4.4G  0 rom
centos7查看硬盘使用情况
### 查看分区和磁盘
lsblk
### 查看空间使用情况
df -h
### 分区工具查看分区信息
fdisk -l
###   查看分区
cfdisk /dev/sda
### 查看硬盘label(别名)
blkid
### 统计当前目录各文件夹大小
du -sh ./*
2. 克隆Rook1.7源码
git clone --single-branch --branch release-1.7 https://github.com/rook/rook.git
cd rook/cluster/examples/kubernetes/Ceph
3. 创建Rook Operator
kubectl create -f crds.yaml -f common.yaml -f operator.yaml

### 验证创建状态
[root@master-1 rook-Ceph]### kubectl get pod -n rook-ceph
NAME                                 READY   STATUS    RESTARTS   AGE
rook-Ceph-operator-cdf9dfd9c-xspnl   1/1     Running   0          42s
4. 创建 Ceph 集群
kubectl create -f cluster-test.yaml

### 验证创建状态
[root@master-1 Ceph]### kubectl get pod -n rook-Ceph-owide
NAME                                           READY   STATUS      RESTARTS   AGE     IP                NODE       NOMINATED NODE   READINESS GATES
csi-Cephfsplugin-provisioner-689686b44-qsm4v   6/6     Running     0          2m15s   10.244.39.42      master-1   <none>           <none>
csi-Cephfsplugin-qzhtj                         3/3     Running     0          2m15s   192.168.172.128   master-1   <none>           <none>
csi-rbdplugin-kf9kh                            3/3     Running     0          2m17s   192.168.172.128   master-1   <none>           <none>
csi-rbdplugin-provisioner-5775fb866b-9fmgb     6/6     Running     0          2m16s   10.244.39.41      master-1   <none>           <none>
rook-Ceph-mgr-a-778799bd78-hmmjc               1/1     Running     0          2m1s    10.244.39.43      master-1   <none>           <none>
rook-Ceph-mon-a-5f5655cb6d-45xks               1/1     Running     0          2m21s   10.244.39.40      master-1   <none>           <none>
rook-Ceph-operator-cdf9dfd9c-6k285             1/1     Running     0          3m53s   10.244.39.36      master-1   <none>           <none>
rook-Ceph-osd-0-66bdb46696-xzxqm               1/1     Running     0          104s    10.244.39.45      master-1   <none>           <none>
rook-Ceph-osd-prepare-master-1--1-ldqnz        0/1     Completed   0          117s    10.244.39.44      master-1   <none>           <none>


### 单节点环境需要去掉污点
### kubectl taint nodes master-1 node-role.kubernetes.io/master:NoSchedule-

### 查看csidriver,已经有rook-Ceph.rbd.csi是块存储,rook-Ceph.Cephfs.csi是文件存储
[root@master-1 Ceph]### kubectl get csidriver
NAME                            ATTACHREQUIRED   PODINFOONMOUNT   STORAGECAPACITY   TOKENREQUESTS   REQUIRESREPUBLISH   MODES        AGE
rook-Ceph.Cephfs.csi.Ceph.com   true             false            false             <unset>         false               Persistent   3m5s
rook-Ceph.rbd.csi.Ceph.com      true             false            false             <unset>         false               Persistent   3m5s
Ceph调试
Rook 工具箱:
Rook 工具箱是一个容器,其中包含用于 rook 调试和测试的常用工具。该工具箱基于 CentOS,因此你可以轻松安装更多你选择的工具yum。
该工具箱可以在两种模式下运行:
1. 交互式:启动一个工具箱 pod,你可以在其中从 shell 连接和执行 Ceph命令
2. 一次性作业:使用 Ceph命令运行脚本并从作业日志中收集结果
先决条件:在运行工具箱之前,你应该部署一个正在运行的 Rook 集群(请参阅快速入门指南)。
启动 rook-Ceph-tools pod:
kubectl create -f cluster/examples/kubernetes/Ceph/toolbox.yaml等待工具箱 pod 下载其容器并进入running状态:
kubectl -n rook-Ceph rollout status deploy/rook-Ceph-toolsrook-Ceph-tools pod 运行后,你可以通过以下方式连接到它:
kubectl -n rook-ceph exec -it deploy/rook-Ceph-tools -- bash工具箱中的所有可用工具都可以满足你的故障排除需求。
示例:
•
Cephstatus•
Cephosd status•
Cephdf•
rados df
完成工具箱后,你可以删除部署:
kubectl -n rook-Cephdelete deploy/rook-Ceph-tools验证集群
要验证集群是否处于健康状态,请连接到Rook 工具箱并运行 Cephstatus命令。
• 所有的mons都应该在法定人数中
• mgr应该是活跃的
• 至少一个 OSD 应该处于活动状态
• 如果不是
HEALTH_OK,则应调查警告或错误。
[root@master-1 Ceph]### kubectl -n rook-ceph exec -it deploy/rook-Ceph-tools -- bash
[root@rook-Ceph-tools-5b54fb98c-tsbq5 /]### cephstatus
  cluster:
    id:     4eb16bae-edca-4599-9c1c-a83bdf1fcdd9
    health: HEALTH_OK

  services:
    mon: 1 daemons, quorum a (age 20m)
    mgr: a(active, since 18m)
    osd: 1 osds: 1 up (since 19m), 1 in (since 19m)

  data:
    pools:   1 pools, 128 pgs
    objects: 0 objects, 0 B
    usage:   5.6 MiB used, 10 GiB / 10 GiB avail
    pgs:     128 active+clean
如果集群不健康,请参阅Ceph常见问题了解更多详细信息和可能的解决方案。
Ceph使用
Ceph是一个开源的分布式存储系统,被广泛应用于云计算、大数据、容器存储等领域。下面是一些常见的Ceph使用方式:
1. 对象存储:Ceph最初被设计为一个对象存储系统,支持通过S3和Swift协议访问对象。对象存储可以用于存储各种类型的数据,例如静态文件、多媒体文件、备份数据等。
2. 块存储:Ceph可以提供块存储服务,类似于传统的存储阵列。块存储可以用于虚拟化环境中的虚拟机映像、容器存储等场景。
3. 文件存储:Ceph也支持文件存储,可以提供类似于NFS和CIFS的文件共享服务。文件存储可以用于大规模数据分析、数据共享等场景。
4. 分布式数据库存储:Ceph可以作为分布式数据库的底层存储,例如Cassandra和MongoDB。
5. 大数据存储:Ceph可以作为Hadoop和Spark等大数据框架的存储后端,提供高可用、高性能的存储服务。
6. 容器存储:Ceph可以作为容器存储的后端,提供动态扩展、高性能的存储服务。例如,Kubernetes可以使用Ceph作为容器存储的后端。
7. 私有云存储:Ceph可以作为私有云存储的后端,为企业提供高可靠性、高可用性的存储服务。
总之,Ceph的灵活性和可扩展性使得它成为了一个非常有用的分布式存储系统。根据不同的应用场景,可以选择不同的Ceph使用方式,并且可以根据实际需求进行配置和优化。
1. 文件存储
Ceph 文件存储(CephFS)是一种基于 Ceph 存储集群提供分布式文件系统服务的方式。它允许用户在不同的节点之间共享文件,并提供了高可用性、高性能和易于扩展的文件存储解决方案。以下是使用 Ceph 文件存储的一些步骤:
1. 创建 CephFS 文件系统 要使用 Ceph 文件存储,需要首先创建一个 CephFS 文件系统。可以使用 Ceph 命令行工具或 Ceph 仪表板来创建文件系统。创建文件系统时需要指定文件系统名称、存储池等信息。
2. 挂载 CephFS 文件系统 在将 CephFS 文件系统挂载到本地系统之前,需要首先在 Ceph 存储集群中创建一个 CephFS 客户端。可以使用 ceph 命令行工具或 Ceph 仪表板来创建 CephFS 客户端。然后,可以在本地系统上使用 mount 命令将 CephFS 文件系统挂载到本地目录。
3. 写入和读取数据 一旦将 CephFS 文件系统挂载到本地系统,就可以像使用本地文件系统一样写入和读取数据。应用程序可以使用标准文件操作命令来将数据写入 CephFS 文件系统,也可以从 CephFS 文件系统读取数据。
4. 卸载 CephFS 文件系统 在使用完 CephFS 文件系统后,需要将其卸载以释放本地目录。可以使用 umount 命令来卸载 CephFS 文件系统。总的来说,Ceph 文件存储为用户提供了一种高可用性、高性能、易于扩展的分布式文件系统解决方案,并且可以与标准文件系统操作命令一起使用,从而实现无缝集成。
要使用 Ceph 文件系统 CRD,需要在 Kubernetes 集群中运行 Rook,并安装了 cephfs 工具包。在创建 Ceph 文件系统之前,需要创建 Ceph 存储集群和 Ceph 文件系统配置。一旦准备就绪,就可以使用 Kubernetes API 创建 Ceph 文件系统 CRD。
注意:
如果 Rook 集群有多个文件系统,并且应用程序 pod 被调度到内核版本早于 4.7 的节点,则可能会出现不一致的结果,因为早于 4.7 的内核不支持指定文件系统命名空间。
Rook 允许通过自定义资源定义 (CRD) 创建和自定义共享文件系统。
git clone --single-branch --branch release-1.7 https://github.com/rook/rook.git
cd rook/cluster/examples/kubernetes/ceph
### 1. 创建文件系统
### CephFilesystem通过为CRD中的元数据池、数据池和元数据服务器指定所需的设置来创建文件系统。
kubectl apply -f ceph/filesystem-test.yaml
### 2. 配置存储
### 在 Rook 开始配置存储之前,需要基于文件系统创建一个 StorageClass。这是 Kubernetes 与 CSI 驱动程序互操作以创建持久卷所必需的。
kubectl apply -f ceph/csi/Cephfs/storageclass.yaml
### 3. 使用共享文件系统:K8s Registry 示例
kubectl apply -f ceph/csi/Cephfs/kube-registry.yaml
创建 Ceph 文件系统
filesystem-test.yaml配置
#################################################################################################################
### Create a filesystem with settings for a test environment where only a single OSD is required.
###  kubectl create -f filesystem-test.yaml
#################################################################################################################

apiVersion: ceph.rook.io/v1
kind: CephFilesystem
metadata:
  name: myfs
  namespace: rook-ceph ### namespace:cluster
spec:
  metadataPool:
    replicated:
      size: 1
      requireSafeReplicaSize: false
  dataPools:
    - failureDomain: osd
      replicated:
        size: 1
        requireSafeReplicaSize: false
  preserveFilesystemOnDelete: false
  metadataServer:
    activeCount: 1
    activeStandby: true
文件系统设置
Metadata
•
name: 要创建的文件系统的名称,将反映在池和其他资源名称中。•
namespace:创建文件系统的 Rook 集群的命名空间。
Pools
这些池允许 Pool CRD 规范中定义的所有设置。
•
metadataPool:用于创建文件系统元数据池的设置。必须使用副本replication)。•
dataPools:创建文件系统数据池的设置。如果指定了多个池,Rook 会将池添加到文件系统。将用户或文件分配给池留给CephFS 文档的读者作为练习。数据池可以使用复制或擦除编码。如果指定了纠删码池,则集群必须在 OSD 上启用 bluestore 的情况下运行。•
preserveFilesystemOnDelete:如果设置为“true”,则在删除 CephFilesystem 资源时文件系统将保留。这是一种安全措施,可以避免在 CephFilesystem 资源被意外删除时丢失数据。默认值为“false”。该选项取代了preservePoolsOnDelete不应再设置的选项。• (已弃用)
preservePoolsOnDelete:此选项已替换为上述选项preserveFilesystemOnDelete。为了向后兼容和升级,如果将其设置为“true”,Rook 将视为preserveFilesystemOnDelete设置为“true”。
Metadata Server设置
Metadata Serve设置对应于 MDS 守护程序设置。
•
activeCount:活跃的 MDS 实例数。随着负载的增加,CephFS 将自动跨 MDS 实例对文件系统进行分区。Rook 将根据活动计数的要求创建双倍数量的 MDS 实例。额外的实例将处于备用模式以进行故障转移。•
activeStandby:如果为 true,额外的 MDS 实例将处于活动备用模式,并将保留文件系统元数据的热缓存以实现更快的故障转移。这些实例将由 CephFS 在故障转移对中分配。如果为 false,额外的 MDS 实例将全部处于被动待机模式,并且不会维护元数据的热缓存。• Metadata Serve:设置文件系统的镜像
•
path: 应用保留的文件系统源路径•
duration:•
path:拍摄快照的文件系统源路径•
interval:快照的频率。可以分别使用 d、h、m 为后缀,来表示以天、小时或分钟为单位指定间隔。•
startTime:可选,确定快照过程开始的时间,使用 ISO 8601 时间格式指定。•
secretNames:要连接的对等点列表。当前(Ceph Pacific 版本)仅支持单个peer ,其中一个peer 代表一个 Ceph 集群。•
enabled:是否在该文件系统上启用了镜像(默认值:false)• peers: 配置镜像节点
• snapshotSchedules:计划快照。支持一个或多个计划。
• snapshotRetention:允许管理保留政策:
•
annotations:要添加的注释的键值对列表。•
labels:要添加的标签的键值对列表。•
placement:可以为 mds pod 提供标准的 Kubernetes 放置限制,包括nodeAffinity、tolerations、podAffinity和podAntiAffinity。•
resources: 为文件系统 MDS Pod(s) 设置资源请求/限制,参见MDS 资源配置设置•
priorityClassName:为文件系统 MDS Pod 设置优先级类名称
####### MDS 资源配置设置
如果声明了内存资源限制,Rook 将自动设置 MDS 配置mds_cache_memory_limit。计算配置值的目的是使实际 MDS 内存消耗与 MDS pod 的资源声明保持一致。
为了提供在容器中运行 Ceph 的最佳体验,Rook 内部建议 MDS 守护进程的内存至少为 4096MB。如果用户配置的限制或请求值太低,Rook 仍会运行 pod 并向Operator日志打印警告。
基于文件系统创建一个 StorageClass
将以下规范另存为storageclass.yaml:
apiVersion: storage.k8s.io/v1
kind: StorageClass
metadata:
  name: rook-cephfs
### Change "rook-ceph" provisioner prefix to match the operator namespace if needed
provisioner: rook-ceph.cephfs.csi.ceph.com ### driver:namespace:operator
parameters:
  ### clusterID is the namespace where the rook cluster is running
  ### If you change this namespace, also change the namespace below where the secret namespaces are defined
  clusterID: rook-ceph ### namespace:cluster

  ### CephFS filesystem name into which the volume shall be created
  fsName: myfs

  ### Ceph pool into which the volume shall be created
  ### Required for provisionVolume: "true"
  pool: myfs-data0

  ### The secrets contain Ceph admin credentials. These are generated automatically by the operator
  ### in the same namespace as the cluster.
  csi.storage.k8s.io/provisioner-secret-name: rook-csi-cephfs-provisioner
  csi.storage.k8s.io/provisioner-secret-namespace: rook-ceph ### namespace:cluster
  csi.storage.k8s.io/controller-expand-secret-name: rook-csi-cephfs-provisioner
  csi.storage.k8s.io/controller-expand-secret-namespace: rook-ceph ### namespace:cluster
  csi.storage.k8s.io/node-stage-secret-name: rook-csi-cephfs-node
  csi.storage.k8s.io/node-stage-secret-namespace: rook-ceph ### namespace:cluster

  ### (optional) The driver can use either ceph-fuse (fuse) or ceph kernel client (kernel)
  ### If omitted, default volume mounter will be used - this is determined by probing for ceph-fuse
  ### or by setting the default mounter explicitly via --volumemounter command-line argument.
  ### mounter: kernel
reclaimPolicy: Delete
allowVolumeExpansion: true
mountOptions:
  ### uncomment the following line for debugging
  #- debug
使用文件系统启动 kube-registry pod
例如,我们使用共享文件系统作为后备存储启动 kube-registry pod。
将以下规范另存为kube-registry.yaml:
apiVersion: v1
kind: PersistentVolumeClaim
metadata:
  name: cephfs-pvc
  namespace: kube-system
spec:
  accessModes:
  - ReadWriteMany
  resources:
    requests:
      storage: 1Gi
  storageClassName: rook-cephfs
---
apiVersion: apps/v1
kind: Deployment
metadata:
  name: kube-registry
  namespace: kube-system
  labels:
    k8s-app: kube-registry
    kubernetes.io/cluster-service: "true"
spec:
  replicas: 3
  selector:
    matchLabels:
      k8s-app: kube-registry
  template:
    metadata:
      labels:
        k8s-app: kube-registry
        kubernetes.io/cluster-service: "true"
    spec:
      containers:
      - name: registry
        image: registry:2
        imagePullPolicy: Always
        resources:
          limits:
            cpu: 100m
            memory: 100Mi
        env:
        ### Configuration reference: https://docs.docker.com/registry/configuration/
        - name: REGISTRY_HTTP_ADDR
          value: :5000
        - name: REGISTRY_HTTP_SECRET
          value: "Ple4seCh4ngeThisN0tAVerySecretV4lue"
        - name: REGISTRY_STORAGE_FILESYSTEM_ROOTDIRECTORY
          value: /var/lib/registry
        volumeMounts:
        - name: image-store
          mountPath: /var/lib/registry
        ports:
        - containerPort: 5000
          name: registry
          protocol: TCP
        livenessProbe:
          httpGet:
            path: /
            port: registry
        readinessProbe:
          httpGet:
            path: /
            port: registry
      volumes:
      - name: image-store
        persistentVolumeClaim:
          claimName: cephfs-pvc
          readOnly: false
部署 kube-registry :
kubectl create -f cluster/examples/kubernetes/ceph/csi/cephfs/kube-registry.yaml现在有一个 docker 镜像存储库,它是具有持久存储的 HA。
2. 块存储
块存储允许单个 pod 挂载存储。
Ceph 块存储是一种基于 Ceph 存储集群提供块级存储服务的方式。它允许用户使用类似于本地磁盘的块设备来存储数据,并提供了高可用性、高性能和易于扩展的存储解决方案。以下是使用 Ceph 块存储的一些步骤:
1. 创建 RBD 镜像: RBD (RADOS Block Device) 是 Ceph 块存储的核心组件。要使用 Ceph 块存储,需要首先创建 RBD 镜像。可以使用 rbd 命令行工具或 Ceph 仪表板来创建 RBD 镜像。创建 RBD 镜像时需要指定镜像大小、存储池、镜像名称等信息。
2. 映射 RBD 镜像: 映射 RBD 镜像意味着将 RBD 镜像映射为本地块设备,以便可以将数据写入该镜像。可以使用 rbd 命令行工具或者使用 Linux 内核自带的 rbd 模块来将 RBD 镜像映射为本地块设备。映射后,可以像使用本地磁盘一样使用 RBD 镜像。
3. 写入和读取数据: 一旦将 RBD 镜像映射为本地块设备,就可以像使用本地磁盘一样写入和读取数据。应用程序可以使用块设备驱动程序来将数据写入 RBD 镜像,也可以从 RBD 镜像读取数据。
4. 卸载 RBD 镜像: 在使用完 RBD 镜像后,需要将其卸载以释放本地块设备。可以使用 rbd 命令行工具或者使用 Linux 内核自带的 rbd 模块来卸载 RBD 镜像。总的来说,Ceph 块存储为用户提供了一种高可用性、高性能、易于扩展的块级存储解决方案,并且可以与标准块设备驱动程序一起使用,从而实现无缝集成。
本指南展示了如何使用 Rook 启用的持久卷在 Kubernetes 上创建一个简单的多层 Web 应用程序。
创建 Ceph 块存储
首先需要创建一个StorageClass和CephBlockPool。这将允许 Kubernetes 在配置持久卷时与 Rook 进行互操作。
以下文件位于 cluster/examples/kubernetes/ceph/csi/rbd/storageclass.yaml
apiVersion: ceph.rook.io/v1
kind: CephBlockPool
metadata:
  name: replicapool
  namespace: rook-ceph
spec:
  failureDomain: host
  replicated:
    size: 3
---
apiVersion: storage.k8s.io/v1
kind: StorageClass
metadata:
   name: rook-ceph-block
### Change "rook-ceph" provisioner prefix to match the operator namespace if needed
provisioner: rook-ceph.rbd.csi.ceph.com
parameters:
    ### clusterID is the namespace where the rook cluster is running
    clusterID: rook-ceph
    ### Ceph pool into which the RBD image shall be created
    pool: replicapool

    ### (optional) mapOptions is a comma-separated list of map options.
    ### For krbd options refer
    ### https://docs.ceph.com/docs/master/man/8/rbd/#kernel-rbd-krbd-options
    ### For nbd options refer
    ### https://docs.ceph.com/docs/master/man/8/rbd-nbd/#options
    ### mapOptions: lock_on_read,queue_depth=1024

    ### (optional) unmapOptions is a comma-separated list of unmap options.
    ### For krbd options refer
    ### https://docs.ceph.com/docs/master/man/8/rbd/#kernel-rbd-krbd-options
    ### For nbd options refer
    ### https://docs.ceph.com/docs/master/man/8/rbd-nbd/#options
    ### unmapOptions: force

    ### RBD image format. Defaults to "2".
    imageFormat: "2"

    ### RBD image features. Available for imageFormat: "2". CSI RBD currently supports only `layering` feature.
    imageFeatures: layering

    ### The secrets contain Ceph admin credentials.
    csi.storage.k8s.io/provisioner-secret-name: rook-csi-rbd-provisioner
    csi.storage.k8s.io/provisioner-secret-namespace: rook-ceph
    csi.storage.k8s.io/controller-expand-secret-name: rook-csi-rbd-provisioner
    csi.storage.k8s.io/controller-expand-secret-namespace: rook-ceph
    csi.storage.k8s.io/node-stage-secret-name: rook-csi-rbd-node
    csi.storage.k8s.io/node-stage-secret-namespace: rook-ceph

    ### Specify the filesystem type of the volume. If not specified, csi-provisioner
    ### will set default as `ext4`. Note that `xfs` is not recommended due to potential deadlock
    ### in hyperconverged settings where the volume is mounted on the same node as the osds.
    csi.storage.k8s.io/fstype: ext4

### Delete the rbd volume when a PVC is deleted
reclaimPolicy: Delete

### Optional, if you want to add dynamic resize for PVC. Works for Kubernetes 1.14+
### For now only ext3, ext4, xfs resize support provided, like in Kubernetes itself.
allowVolumeExpansion: true注意:此示例要求每个节点至少有 1 个 OSD,每个 OSD 位于3 个不同的节点上。因为
failureDomain设置为host并且replicated.size设置为3。
如果你已将 Rook operator 部署在“rook-ceph”以外的命名空间中,请更改配置器中的前缀以匹配你使用的命名空间。例如,如果 Rook operator 在命名空间“my-namespace”中运行,则配置程序值应为“my-namespace.rbd.csi.ceph.com”。
创建存储类。
kubectl create -f cluster/examples/kubernetes/ceph/csi/rbd/storageclass.yaml使用块存储空间:Wordpress 示例
我们创建了一个示例应用程序 wordpress 和 mysql 。这两个应用程序都将使用 Rook 提供的块存储。
kubectl create -f cluster/examples/kubernetes/mysql.yaml
kubectl create -f cluster/examples/kubernetes/wordpress.yaml
mysql.yaml资源清单
apiVersion: v1
kind: Service
metadata:
  name: wordpress-mysql
  labels:
    app: wordpress
spec:
  ports:
    - port: 3306
  selector:
    app: wordpress
    tier: mysql
  clusterIP: None
---
apiVersion: v1
kind: PersistentVolumeClaim
metadata:
  name: mysql-pv-claim
  labels:
    app: wordpress
spec:
  storageClassName: rook-ceph-block
  accessModes:
    - ReadWriteOnce
  resources:
    requests:
      storage: 20Gi
---
apiVersion: apps/v1
kind: Deployment
metadata:
  name: wordpress-mysql
  labels:
    app: wordpress
    tier: mysql
spec:
  selector:
    matchLabels:
      app: wordpress
      tier: mysql
  strategy:
    type: Recreate
  template:
    metadata:
      labels:
        app: wordpress
        tier: mysql
    spec:
      containers:
        - image: mysql:5.6
          name: mysql
          env:
            - name: MYSQL_ROOT_PASSWORD
              value: changeme
          ports:
            - containerPort: 3306
              name: mysql
          volumeMounts:
            - name: mysql-persistent-storage
              mountPath: /var/lib/mysql
      volumes:
        - name: mysql-persistent-storage
          persistentVolumeClaim:
            claimName: mysql-pv-claim
wordpress.yaml资源清单
apiVersion: v1
kind: Service
metadata:
  name: wordpress
  labels:
    app: wordpress
spec:
  ports:
    - port: 80
  selector:
    app: wordpress
    tier: frontend
  type: LoadBalancer
---
apiVersion: v1
kind: PersistentVolumeClaim
metadata:
  name: wp-pv-claim
  labels:
    app: wordpress
spec:
  storageClassName: rook-ceph-block
  accessModes:
    - ReadWriteOnce
  resources:
    requests:
      storage: 20Gi
---
apiVersion: apps/v1
kind: Deployment
metadata:
  name: wordpress
  labels:
    app: wordpress
    tier: frontend
spec:
  selector:
    matchLabels:
      app: wordpress
      tier: frontend
  strategy:
    type: Recreate
  template:
    metadata:
      labels:
        app: wordpress
        tier: frontend
    spec:
      containers:
        - image: wordpress:4.6.1-apache
          name: wordpress
          env:
            - name: WORDPRESS_DB_HOST
              value: wordpress-mysql
            - name: WORDPRESS_DB_PASSWORD
              value: changeme
          ports:
            - containerPort: 80
              name: wordpress
          volumeMounts:
            - name: wordpress-persistent-storage
              mountPath: /var/www/html
      volumes:
        - name: wordpress-persistent-storage
          persistentVolumeClaim:
            claimName: wp-pv-claim
这两个应用程序都会创建一个块卷并将其挂载到各自的 pod。你可以通过运行以下命令查看 Kubernetes 卷声明:
$ kubectl get pvc

NAME             STATUS    VOLUME                                     CAPACITY   ACCESSMODES   AGE
mysql-pv-claim   Bound     pvc-95402dbc-efc0-11e6-bc9a-0cc47a3459ee   20Gi       RWO           1m
wp-pv-claim      Bound     pvc-39e43169-efc1-11e6-bc9a-0cc47a3459ee   20Gi       RWO           1m
一旦 wordpress 和 mysql pod 处于状态Running,获取 wordpress 应用程序的集群 IP ,并可以通过nodeport端口在浏览器访问:
$ kubectl get svc wordpress
NAME        CLUSTER-IP   EXTERNAL-IP   PORT(S)        AGE
wordpress   10.3.0.155   <pending>     80:30841/TCP   2m
3. 对象存储
https://rook.io/docs/rook/v1.7/ceph-object.html
Ceph 对象存储是一种基于 Ceph 存储集群提供对象存储服务的方式。它允许用户存储和检索大量的非结构化数据,并提供了高可用性、高性能和易于扩展的存储解决方案。以下是使用 Ceph 对象存储的一些步骤:
1. 创建存储池: 在使用 Ceph 对象存储之前,需要首先创建一个存储池。可以使用 ceph 命令行工具或 Ceph 仪表板来创建存储池。创建存储池时需要指定存储池名称、副本数、存储池大小等信息。
2. 上传对象: 在创建存储池之后,可以使用 rados 命令行工具或 Ceph 仪表板上传对象到存储池中。上传对象时需要指定对象名称、对象数据和存储池名称。
3. 检索对象: 一旦将对象上传到存储池中,就可以使用 rados 命令行工具或 Ceph 仪表板检索对象。检索对象时需要指定对象名称和存储池名称。
4. 删除对象: 如果不再需要对象,可以使用 rados 命令行工具或 Ceph 仪表板删除对象。删除对象时需要指定对象名称和存储池名称。
总的来说,Ceph 对象存储为用户提供了一种高可用性、高性能、易于扩展的对象存储解决方案,并且可以与标准对象存储操作命令一起使用,从而实现无缝集成。
创建Ceph对象存储
对象存储向存储集群公开一个 S3 API,供应用程序存储和获取数据。
Rook 能够在 Kubernetes 中部署对象存储或连接到外部 RGW 服务。最常见的是,对象存储将由 Rook 在本地配置。或者,如果你有一个带有 Rados 网关的Ceph 集群。
创建本地对象存储
下面的资源清单将创建一个CephObjectStore对象,他会使用 S3 API 在集群中启动 RGW 服务。
kubectl create -f cluster/examples/kubernetes/ceph/object.yamlmy-store资源清单
apiVersion: ceph.rook.io/v1
kind: CephObjectStore
metadata:
  name: my-store
  namespace: rook-ceph
spec:
  metadataPool:
    failureDomain: host
    replicated:
      size: 3
  dataPool:
    failureDomain: host
    erasureCoded:
      dataChunks: 2
      codingChunks: 1
  preservePoolsOnDelete: true
  gateway:
    sslCertificateRef:
    port: 80
    ### securePort: 443
    instances: 1
  healthCheck:
    bucket:
      disabled: false
interval: 60s注意:此示例需要至少 3 个 bluestore OSD,每个 OSD 位于不同的节点上。OSD 必须位于不同的节点上,因为failureDomain设置为host并且erasureCoded设置需要至少 3 个不同的 OSD (2 dataChunks+ 1 codingChunks)。
测试环境或节点只有一个,可以使用
kubectl create -f cluster/examples/kubernetes/ceph/object-test.yamlobject-test.yaml资源清单
#################################################################################################################
### Create an object store with settings for a test environment. Only a single OSD is required in this example.
###  kubectl create -f object-test.yaml
#################################################################################################################

apiVersion: ceph.rook.io/v1
kind: CephObjectStore
metadata:
  name: my-store
  namespace: rook-ceph ### namespace:cluster
spec:
  metadataPool:
    replicated:
      size: 1
  dataPool:
    replicated:
      size: 1
  preservePoolsOnDelete: false
  gateway:
    port: 80
    ### securePort: 443
instances: 1创建CephObjectStore后,Rook operator将创建启动服务所需的所有池和其他资源。这可能需要几分钟才能完成。
### Create the object store
kubectl create -f object.yaml

### To confirm the object store is configured, wait for the rgw pod to start
kubectl -n rook-ceph get pod -l app=rook-ceph-rgw
连接到外部对象存储
Rook 可以连接现有的 RGW 网关,与 CephCluster CRD 的外部模式协同工作。如果你有外部CephClusterCR,则可以指示 Rook 使用以下内容使用外部网关:
kubectl create -f cluster/examples/kubernetes/ceph/object-external.yamlobject-external.yaml资源清单
#################################################################################################################
### Create an object store with settings for replication in a production environment. A minimum of 3 hosts with
### OSDs are required in this example.
###  kubectl create -f object.yaml
#################################################################################################################

apiVersion: ceph.rook.io/v1
kind: CephObjectStore
metadata:
  name: external-store
  namespace: rook-ceph ### namespace:cluster
spec:
  gateway:
    ### The port on which **ALL** the gateway(s) are listening on.
    ### Passing a single IP from a load-balancer is also valid.
    port: 80
    externalRgwEndpoints:
      - ip: 192.168.39.182
  healthCheck:
    bucket:
      disabled: false
interval: 60s你可以使用现有object-external.yaml文件。准备就绪后,ceph-object-controller 将在 Operator 日志中输出类似于此的消息:
ceph-object-controller: ceph object store gateway service >running at 10.100.28.138:8080你现在可以通过以下方式获取和访问对象存储:
kubectl -n rook-ceph get svc -l app=rook-ceph-rgw

NAME                     TYPE        CLUSTER-IP      EXTERNAL-IP   PORT(S)    AGE
rook-ceph-rgw-my-store   ClusterIP   10.100.28.138   <none>        8080/TCP   6h59m
kubernetes集群中的任何 pod 现在都可以访问此端点:
### 使用ClusterIP访问
$ curl 10.100.28.138:8080
### 或使用ServiName访问
$ curl rook-ceph-rgw-my-store.rook-ceph:8080

<?xml version="1.0" encoding="UTF-8"?><ListAllMyBucketsResult xmlns="http://s3.amazonaws.com/doc/2006-03-01/"><Owner><ID>anonymous</ID><DisplayName></DisplayName></Owner><Buckets></Buckets></ListAllMyBucketsResult>
创建一个桶
现在对象存储已配置,接下来我们需要创建一个存储桶,客户端可以在其中读取和写入对象。
可以通过定义存储类来创建存储桶,类似于块和文件存储使用的模式。首先,定义允许对象客户端创建存储桶的存储类。
存储类定义了对象存储系统、桶保留策略和管理员所需的其他属性。
kubectl create -f cluster/examples/kubernetes/ceph/storageclass-bucket-delete.yamlstorageclass-bucket-delete.yaml资源清单
由于
Delete回收政策,该示例被如此命名
apiVersion: storage.k8s.io/v1
kind: StorageClass
metadata:
   name: rook-ceph-delete-bucket
provisioner: rook-ceph.ceph.rook.io/bucket ### driver:namespace:cluster
### set the reclaim policy to delete the bucket and all objects
### when its OBC is deleted.
reclaimPolicy: Delete
parameters:
   objectStoreName: my-store
   objectStoreNamespace: rook-ceph ### namespace:cluster
   region: us-east-1
   ### To accommodate brownfield cases reference the existing bucket name here instead
   ### of in the ObjectBucketClaim (OBC). In this case the provisioner will grant
   ### access to the bucket by creating a new user, attaching it to the bucket, and
   ### providing the credentials via a Secret in the namespace of the requesting OBC.
   #bucketName:
如果你已将 Rook operator部署在除
rook-ceph以外的命名空间中,请更改provisioner中的前缀以匹配你使用的命名空间。例如,如果 Rook operator 在
my-namespace命名空间中运行,则provisioner 值应该是my-namespace.ceph.rook.io/bucket。
基于此存储类,对象客户端现在可以通过创建对象桶声明 (OBC) 来请求桶。创建 OBC 时,Rook-Ceph 存储桶provisioner将创建一个新存储桶。请注意,OBC 引用了上面创建的存储类。
kubectl create -f cluster/examples/kubernetes/ceph/object-bucket-claim-delete.yamlobject-bucket-claim-delete.yaml资源清单
由于
Delete回收政策,该示例被如此命名
apiVersion: objectbucket.io/v1alpha1
kind: ObjectBucketClaim
metadata:
  name: ceph-delete-bucket
spec:
  ### To create a new bucket specify either `bucketName` or
  ### `generateBucketName` here. Both cannot be used. To access
  ### an existing bucket the bucket name needs to be defined in
  ### the StorageClass referenced here, and both `bucketName` and
  ### `generateBucketName` must be omitted in the OBC.
  #bucketName:
  generateBucketName: ceph-bkt
  storageClassName: rook-ceph-delete-bucket
  additionalConfig:
    ### To set for quota for OBC
    #maxObjects: "1000"
    #maxSize: "2G"
现在声明已创建,Operator将创建存储桶并生成其他工件以启用对存储桶的访问。
secret 和 ConfigMap 使用与 OBC 相同的名称并在相同的命名空间中创建。该secret 包含应用程序 pod 用于访问存储桶的凭据。ConfigMap 包含存储桶端点信息,也被 Pod 使用。
客户端连接
以下命令从 secret 和 configmap 中提取关键信息:”
#config-map, secret, OBC will part of default if no specific namespace mentioned
export AWS_HOST=$(kubectl -n default get cm ceph-bucket -o jsonpath='{.data.BUCKET_HOST}')

export ACCESS_KEY_ID=$(kubectl -n default get secret ceph-bucket -o jsonpath='{.data.AWS_ACCESS_KEY_ID}' | base64 --decode)

export SECRET_ACCESS_KEY=$(kubectl -n default get secret ceph-bucket -o jsonpath='{.data.AWS_SECRET_ACCESS_KEY}' | base64 --decode)
•
Host: 在集群中找到 rgw 服务的 DNS 主机名。假设你使用的是默认rook-ceph集群,它将是rook-ceph-rgw-my-store.rook-ceph.•
Endpoint:rgw 服务正在侦听的端点。运行kubectl -n rook-ceph get svc rook-ceph-rgw-my-store,然后组合 clusterIP 和端口。•
access_key和secret_key: 认证凭据信息
集群内使用对象存储
安装 s3cmd
为了测试,CephObjectStore我们将该工具安装s3cmd到工具箱 pod 中。
yum --assumeyes install s3cmdPUT 或 GET 对象
将文件上传到新创建的存储桶
echo "Hello Rook" > /tmp/rookObj
s3cmd put /tmp/rookObj --no-ssl --host=${AWS_HOST} --host-bucket=  s3://rookbucket
从存储桶中下载并验证文件
s3cmd get s3://rookbucket/rookObj /tmp/rookObj-download --no-ssl --host=${AWS_HOST} --host-bucket=
cat /tmp/rookObj-download
集群外使用对象存储
Rook 设置对象存储,以便 Pod 可以访问集群内部。如果你的应用程序在集群外运行,你将需要通过NodePort来暴露服务。
首先,注意向集群公开 RGW 内部的服务。我们将原封不动地保留此服务,并为外部访问创建一个新服务。
kubectl -n rook-ceph get service rook-ceph-rgw-my-store

NAME                     CLUSTER-IP   EXTERNAL-IP   PORT(S)     AGE
rook-ceph-rgw-my-store 10.3.0.177 <none> 80/TCP 2mrgw-external.yaml资源清单
apiVersion: v1
kind: Service
metadata:
  name: rook-ceph-rgw-my-store-external
  namespace: rook-ceph ### namespace:cluster
  labels:
    app: rook-ceph-rgw
    rook_cluster: rook-ceph ### namespace:cluster
    rook_object_store: my-store
spec:
  ports:
    - name: rgw
      port: 80 ### service port mentioned in object store crd
      protocol: TCP
      targetPort: 8080
  selector:
    app: rook-ceph-rgw
    rook_cluster: rook-ceph ### namespace:cluster
    rook_object_store: my-store
  sessionAffinity: None
  type: NodePort
现在创建外部服务。
kubectl create -f cluster/examples/kubernetes/ceph/rgw-external.yaml查看正在运行的两个 rgw 服务并注意外部服务在哪个端口上运行:
kubectl -n rook-ceph get service rook-ceph-rgw-my-store rook-ceph-rgw-my-store-external

NAME                              TYPE        CLUSTER-IP       EXTERNAL-IP   PORT(S)        AGE
rook-ceph-rgw-my-store            ClusterIP   10.104.82.228    <none>        80/TCP         4m
rook-ceph-rgw-my-store-external   NodePort    10.111.113.237   <none>        80:31536/TCP   39s
在内部,rgw 服务在端口上运行80,外部端口是31536。现在你可以从任何地方访问CephObjectStore!你只需要集群中任何机器的主机名、外部端口和用户凭据。
对象存储CephObjectStore 配置说明
apiVersion: ceph.rook.io/v1
kind: CephObjectStore
metadata:
  name: my-store
  namespace: rook-ceph
spec:
  metadataPool:
    failureDomain: host
    replicated:
      size: 3
  dataPool:
    failureDomain: host
    erasureCoded:
      dataChunks: 2
      codingChunks: 1
  preservePoolsOnDelete: true
  gateway:
    ### sslCertificateRef:
    ### caBundleRef:
    port: 80
    ### securePort: 443
    instances: 1
    ### A key/value list of annotations
    annotations:
    ###  key: value
    placement:
    ###  nodeAffinity:
    ###    requiredDuringSchedulingIgnoredDuringExecution:
    ###      nodeSelectorTerms:
    ###      - matchExpressions:
    ###        - key: role
    ###          operator: In
    ###          values:
    ###          - rgw-node
    ###  tolerations:
    ###  - key: rgw-node
    ###    operator: Exists
    ###  podAffinity:
    ###  podAntiAffinity:
    ###  topologySpreadConstraints:
    resources:
    ###  limits:
    ###    cpu: "500m"
    ###    memory: "1024Mi"
    ###  requests:
    ###    cpu: "500m"
    ###    memory: "1024Mi"
  #zone:
    #name: zone-a
Metadata
•
name: 要创建的对象存储的名称,将反映在池和其他资源名称中。•
namespace:创建对象存储的 Rook 集群的命名空间。
Pools
这些池允许 Pool CRD 规范中定义的所有设置。
当zone设置该部分时,将不会创建具有对象存储名称的池,因为对象存储将使用由 ceph-object-zone 创建的池。
•
metadataPool:用于创建所有对象存储元数据池的设置。必须使用复制。•
dataPool:创建对象存储数据池的设置。可以使用复制或擦除编码。•
preservePoolsOnDelete:如果将其设置为“true”,则在删除对象存储时,用于支持对象存储的池将保留。这是一种避免意外丢失数据的安全措施。它默认设置为“false”。如果没有指定也被视为'false'。
网关设置
网关设置对应于 RGW 守护程序设置。
•
type: 支持S3•
sslCertificateRef:如果指定,这是包含用于安全连接到对象存储的 TLS 证书的 Kubernetes 秘密(opaque或类型)的名称。•
caBundleRef:如果指定,这是包含要使用的其他自定义 ca-bundle 的Kubernetes secret (类型为 opaque)的名称。secret 必须与 Rook 集群位于同一命名空间中。•
port:可访问对象服务的端口。如果启用主机网络,RGW 守护程序也将侦听该端口。如果在 SDN 上运行,RGW 守护程序监听端口将在内部为 8080。•
securePort:RGW pod 将侦听的安全端口。sslCerticateRef必须通过或指定 TLS 证书service.annotations•
instances:将启动负载平衡此对象存储的 pod 数量。•
externalRgwEndpoints:连接到外部现有 Rados 网关的 IP 地址列表(适用于外部模式)。CephCluster如果未启用规范,则此设置将被忽略external。•
annotations:要添加的注释的键值对列表。•
labels:要添加的标签的键值对列表。•
placement:Kubernetes 放置设置,用于确定 RGW pod 在集群中的启动位置。•
resources:为 Gateway Pod 设置资源请求/限制。•
priorityClassName:为网关 Pod 设置优先级类名称•
service:在RGW的Kubernetes Service上设置的注解。以下示例启用了 Openshift 中支持的 服务服务证书:gateway:要连接到的外部 rgw 端点示例:
service:
annotations:
service.beta.openshift.io/serving-cert-secret-name: <name of TLS secret for automatic generation>gateway:这将创建一个端点位于
port: 80
externalRgwEndpoints:
- ip: 192.168.39.182192.168.39.182port 上的服务80,指向 Ceph 对象外部网关。网关部分的所有其他设置都将被忽略,除了securePort。
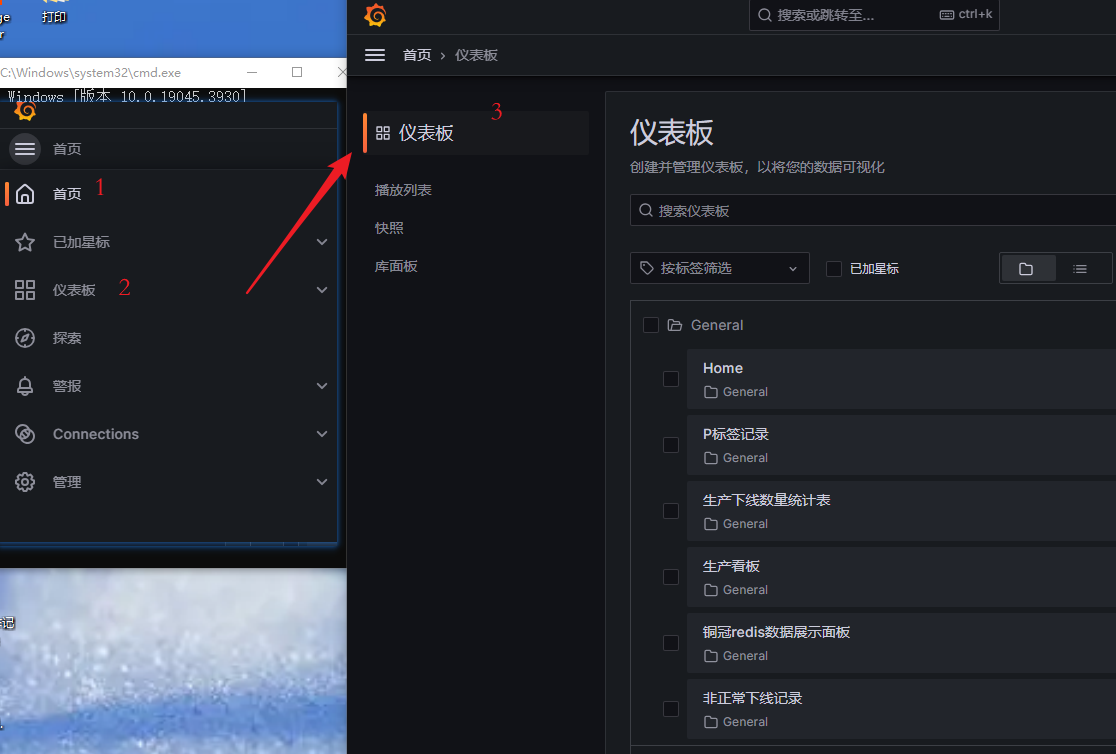
Ceph仪表板
[root@master-1 Ceph]### kubectl -n rook-Ceph get service
NAME                       TYPE        CLUSTER-IP       EXTERNAL-IP   PORT(S)             AGE

rook-Ceph-mgr              ClusterIP   10.103.255.106   <none>        9283/TCP            26m
rook-Ceph-mgr-dashboard    ClusterIP   10.106.241.211   <none>        7000/TCP            26m
第一个服务用于报告Prometheus 指标,而后一个服务用于仪表板。
使用nodeport方式暴露dashboard
### 方式一:修改原有文件,使用nodeport方式暴露dashboard
kubectl get svc rook-Ceph-mgr-dashboard -n rook-Ceph-oyaml>dashboard-nodeport-http.yaml
### 修改type为nodeport

### 方式二:直接使用新文件,使用nodeport方式暴露dashboard
kubectl apply -f dashboard-external-http.yaml

[root@master-1 Ceph]### kubectl -n rook-Cephget service
NAME                                    TYPE        CLUSTER-IP       EXTERNAL-IP   PORT(S)             AGE
rook-Ceph-mgr                           ClusterIP   10.103.255.106   <none>        9283/TCP            35m
rook-Ceph-mgr-dashboard                 ClusterIP   10.106.241.211   <none>        7000/TCP            35m
rook-Ceph-mgr-dashboard-external-http   NodePort    10.108.168.208   <none>        7000:32766/TCP      64s
查找登录信息
连接到仪表板后,你需要登录以进行安全访问。Rook 创建一个名为admin的默认用户 ,并在运行 Rook Ceph集群的命名空间中生成一个名为rook-Ceph-dashboard-password的 secret 。要检索生成的密码,你可以运行以下命令:
kubectl -n rook-Cephget secret rook-Ceph-dashboard-password -o jsonpath="{['data']['password']}" | base64 --decode && echo

[root@master-1 Ceph]### kubectl -n rook-Cephget secret rook-Ceph-dashboard-password -o jsonpath="{['data']['password']}" | base64 --decode && echo
]Yp<&5st2)>Y'J<.w"'1
Login to the console with admin/<password>.
[root@master-1 rook-Ceph]### ss -anpl | grep 32405
tcp    LISTEN     0      128       *:32405                 *:*                   users:(("kube-proxy",pid=3411,fd=19))
Ceph 仪表板是 Ceph 存储集群的 Web 界面,可用于监视和管理 Ceph 集群。以下是使用 Ceph 仪表板的一些步骤:
1. 登录到 Ceph 仪表板 在 Web 浏览器中输入 Ceph 存储集群的 IP 地址和端口,然后使用管理员凭据登录。
2. 查看 Ceph 集群状态 Ceph 仪表板默认显示 Ceph 集群的概述,包括群集健康状况、可用存储容量、活跃客户端数等。
3. 查看存储池 存储池是 Ceph 集群中存储对象的集合。在 Ceph 仪表板中,可以查看存储池的列表,以及有关每个存储池的详细信息,例如存储池的大小、对象数、副本数等。
4. 查看 OSD(对象存储设备) OSD 是 Ceph 集群中存储对象的实际物理设备。在 Ceph 仪表板中,可以查看 OSD 的列表,以及有关每个 OSD 的详细信息,例如 OSD 的状态、容量等。
5. 查看客户端 客户端是访问 Ceph 存储集群的应用程序或计算机。在 Ceph 仪表板中,可以查看客户端的列表,以及有关每个客户端的详细信息,例如客户端的 IP 地址、连接数等。
6. 查看监视器 监视器是 Ceph 存储集群中用于管理和控制数据的进程。在 Ceph 仪表板中,可以查看监视器的列表,以及有关每个监视器的详细信息,例如监视器的状态、运行时间等。
7. 修改 Ceph 集群配置 在 Ceph 仪表板中,可以修改 Ceph 集群的配置。例如,可以添加、删除 OSD 或存储池,调整存储池的大小,更改副本数等。
总的来说,Ceph 仪表板提供了一个易于使用的界面,方便管理员监视和管理 Ceph 存储集群。
Ceph清理
cd ~/go/src/github.com/rook/cluster/examples/kubernetes/Ceph
kubectl delete -f csi/rbd/storageclass-test.yaml
kubectl delete -f cluster-test.yaml
kubectl delete -f crds.yaml -f common.yaml -f operator.yaml
kubectl delete ns rook-Ceph
编辑下面四个文件,将finalizer的值修改为null,例如
finalizers:
    - Ceph.rook.io/disaster-protection/
修改为
finalizers:nullkubectl edit secret -n rook-Ceph
kubectl edit configmap -n rook-Ceph
kubectl edit Cephclusters -n rook-Ceph
kubectl edit Cephblockpools -n rook-Ceph执行下面循环,直至找不到任何rook关联对象。
for i in `kubectl api-resources | grep true | awk '{print \$1}'`; do echo $i;kubectl get $i -n rook-Ceph; done

rm -rf /var/lib/rocanok
Ceph异常问题
1. rook-Cephfs: code = Aborted pvc- already exists
Warning ProvisioningFailed 3s (x3 over 6s) rook-Ceph.Cephfs.csi.Ceph.com_csi-Cephfsplugin-provisioner-689686b44-z6bsv_0e977714-5460-415a-9443-bdef2389ed94 failed to provision volume with StorageClass "rook-Cephfs": rpc error: code = Aborted desc = an operation with the given Volume ID pvc-27dfe624-8f4c-419a-9844-f81754de2e6d already exists问题原因
创建CephFilesystem的文件,要求每个节点至少有 1 个 OSD,每个 OSD 位于3 个不同的节点上。如下
apiVersion: Ceph.rook.io/v1
kind: CephFilesystem
metadata:
  name: myfs
  namespace: rook-Ceph
spec:
  metadataPool:
    failureDomain: host
    replicated:
      size: 3
  dataPools:
    - failureDomain: host
      replicated:
        size: 3
  preserveFilesystemOnDelete: true
  metadataServer:
    activeCount: 1
    activeStandby: true
    ### A key/value list of annotations
    annotations:
    ###  key: value
    placement:
    ###  nodeAffinity:
    ###    requiredDuringSchedulingIgnoredDuringExecution:
    ###      nodeSelectorTerms:
    ###      - matchExpressions:
    ###        - key: role
    ###          operator: In
    ###          values:
    ###          - mds-node
    ###  tolerations:
    ###  - key: mds-node
    ###    operator: Exists
    ###  podAffinity:
    ###  podAntiAffinity:
    ###  topologySpreadConstraints:
    resources:
    ###  limits:
    ###    cpu: "500m"
    ###    memory: "1024Mi"
    ###  requests:
    ###    cpu: "500m"
    ###    memory: "1024Mi"
这就需要至少 3 个 bluestore OSD,每个 OSD 位于不同的节点上。对于只有一个
[root@master-1 Ceph]### kubectl -n rook-Cephexec -it deploy/rook-Ceph-tools -- bash
[root@rook-Ceph-tools-5b54fb98c-n6qwk /]### Cephosd pool ls detail
pool 1 'device_health_metrics' replicated size 1 min_size 1 crush_rule 0 object_hash rjenkins pg_num 128 pgp_num 128 pg_num_target 32 pgp_num_target 32 autoscale_mode on last_change 44 lfor 0/0/16 flags hashpspool stripe_width 0 pg_num_min 1 application mgr_devicehealth
pool 2 'myfs-metadata' replicated size 3 min_size 2 crush_rule 1 object_hash rjenkins pg_num 32 pgp_num 32 autoscale_mode on last_change 41 flags hashpspool stripe_width 0 pg_autoscale_bias 4 pg_num_min 16 recovery_priority 5 application Cephfs
pool 3 'myfs-data0' replicated size 3 min_size 2 crush_rule 2 object_hash rjenkins pg_num 32 pgp_num 32 autoscale_mode on last_change 42 flags hashpspool stripe_width 0 application Cephfs
pool 4 'replicapool' replicated size 1 min_size 1 crush_rule 3 object_hash rjenkins pg_num 32 pgp_num 32 autoscale_mode on last_change 51 flags hashpspool,selfmanaged_snaps stripe_width 0 application rbd
对于只有一个 OSD 的测试,需要使用 Replica 值为 1 或使用 filesystem-test.yaml,它只需要一个 OSD。
#################################################################################################################
### Create a filesystem with settings for a test environment where only a single OSD is required.
###  kubectl create -f filesystem-test.yaml
#################################################################################################################

apiVersion: Ceph.rook.io/v1
kind: CephFilesystem
metadata:
  name: myfs
  namespace: rook-Ceph### namespace:cluster
spec:
  metadataPool:
    replicated:
      size: 1
      requireSafeReplicaSize: false
  dataPools:
    - failureDomain: osd
      replicated:
        size: 1
        requireSafeReplicaSize: false
  preserveFilesystemOnDelete: false
  metadataServer:
    activeCount: 1
    activeStandby: true
参考链接
• 在 Kubernetes 集群中运行 Rook 的示例:https://github.com/rook/rook/tree/release-1.7/cluster/examples/kubernetes
• Rook 部署示例:https://github.com/rook/rook/tree/master/deploy/examples
• Ceph 文件存储:https://rook.io/docs/rook/v1.7/ceph-filesystem-crd.html
• Ceph 对象存储:https://rook.io/docs/rook/v1.7/ceph-object.html
• Ceph 对象存储配置信息:https://rook.io/docs/rook/v1.7/ceph-object-store-crd.html#object-store-settings
• CephObjectBucketClaims: https://rook.io/docs/rook/v1.7/ceph-object-bucket-claim.html
• Ceph 块存储:https://rook.io/docs/rook/v1.7/ceph-block.html
• Ceph PoolCRD 设置: https://rook.io/docs/rook/v1.7/ceph-pool-crd.html
• Ceph DashBoard:https://rook.io/docs/rook/v1.7/Ceph-dashboard.html
• Ceph 工具箱:https://rook.io/docs/rook/v1.7/Ceph-toolbox.html
本文转载自:「云原生百宝箱」,原文:https://url.hi-linux.com/5Ulrz,版权归原作者所有。欢迎投稿,投稿邮箱: editor@hi-linux.com。

最近,我们建立了一个技术交流微信群。目前群里已加入了不少行业内的大神,有兴趣的同学可以加入和我们一起交流技术,在 「奇妙的 Linux 世界」 公众号直接回复 「加群」 邀请你入群。

你可能还喜欢
点击下方图片即可阅读
Nginx 是如何解决惊群效应的?
点击上方图片,『美团|饿了么』外卖红包天天免费领

更多有趣的互联网新鲜事,关注「奇妙的互联网」视频号全了解!

鸿蒙生态一站式服务平台。
更多推荐
 1
1 0
0- 0


 已为社区贡献6条内容

所有评论(0)